Infrastructure Provisioning
The Infrastructure Provisioning Service allows you to create required resources within a Cloud Service Provider of your choice. CloudUnity being an up and coming product evolving everyday, at the moment we allow Infrastructure Provisioning for only AWS and Azure, more Cloud Service Providers to be added soon. At the moment we allow you to create the following resources only
-
Compute
-
Database
-
Storage
-
Network
An example for allowed resources to be created in AWS would be the EC2 instances, S3 buckets, RDS and VPC. Upon enetering the Infrastructure Provisioning service, you are greeted by the page below.
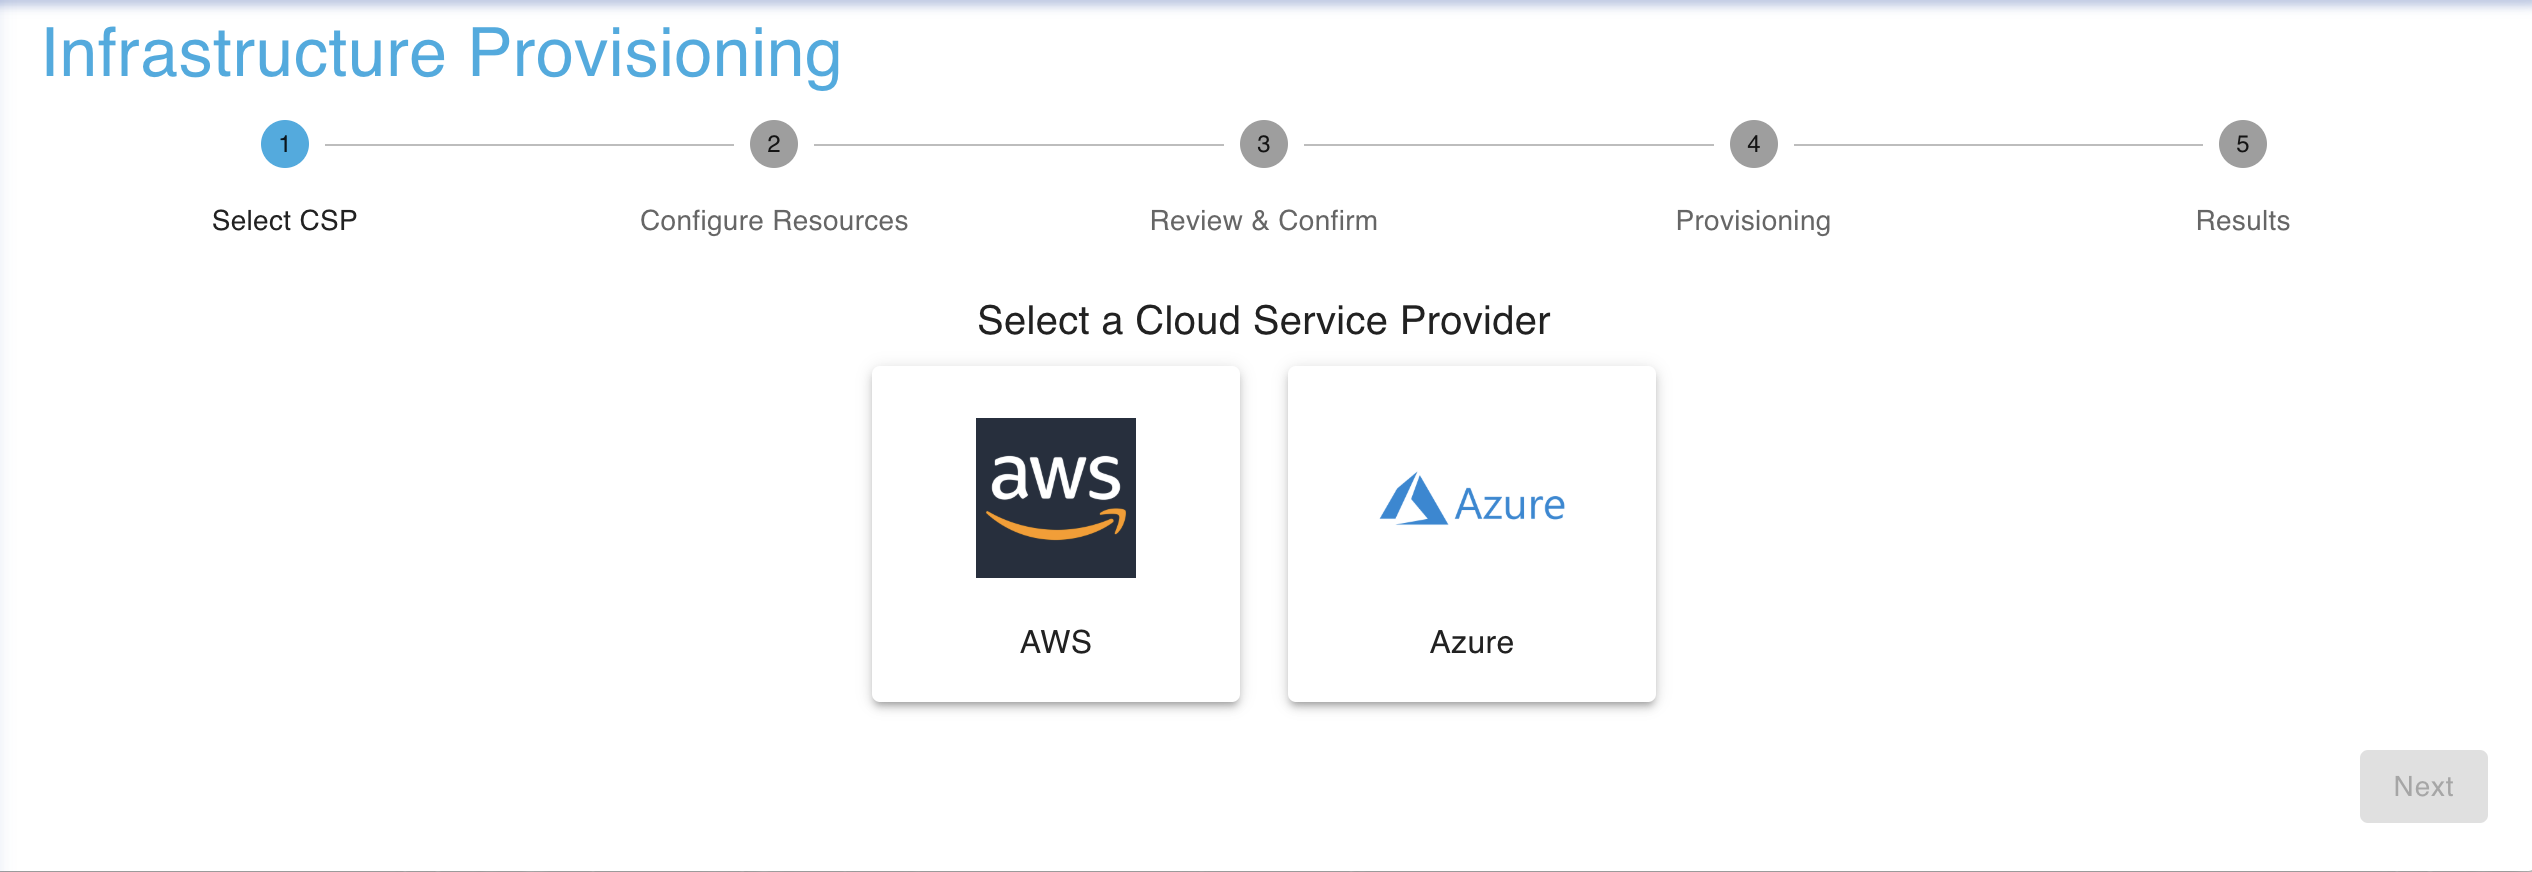
CSP Selection
Your first step towards acheiving the infrastructure you have planned on creating, you will have to choose between AWS and Azure.
Configure Resources with AWS
If you have chosen AWS you will be allowed to configure the following resources
-
VPC Configuration
-
EC2 Configuration
-
S3 Configuration
-
RDS Configuration
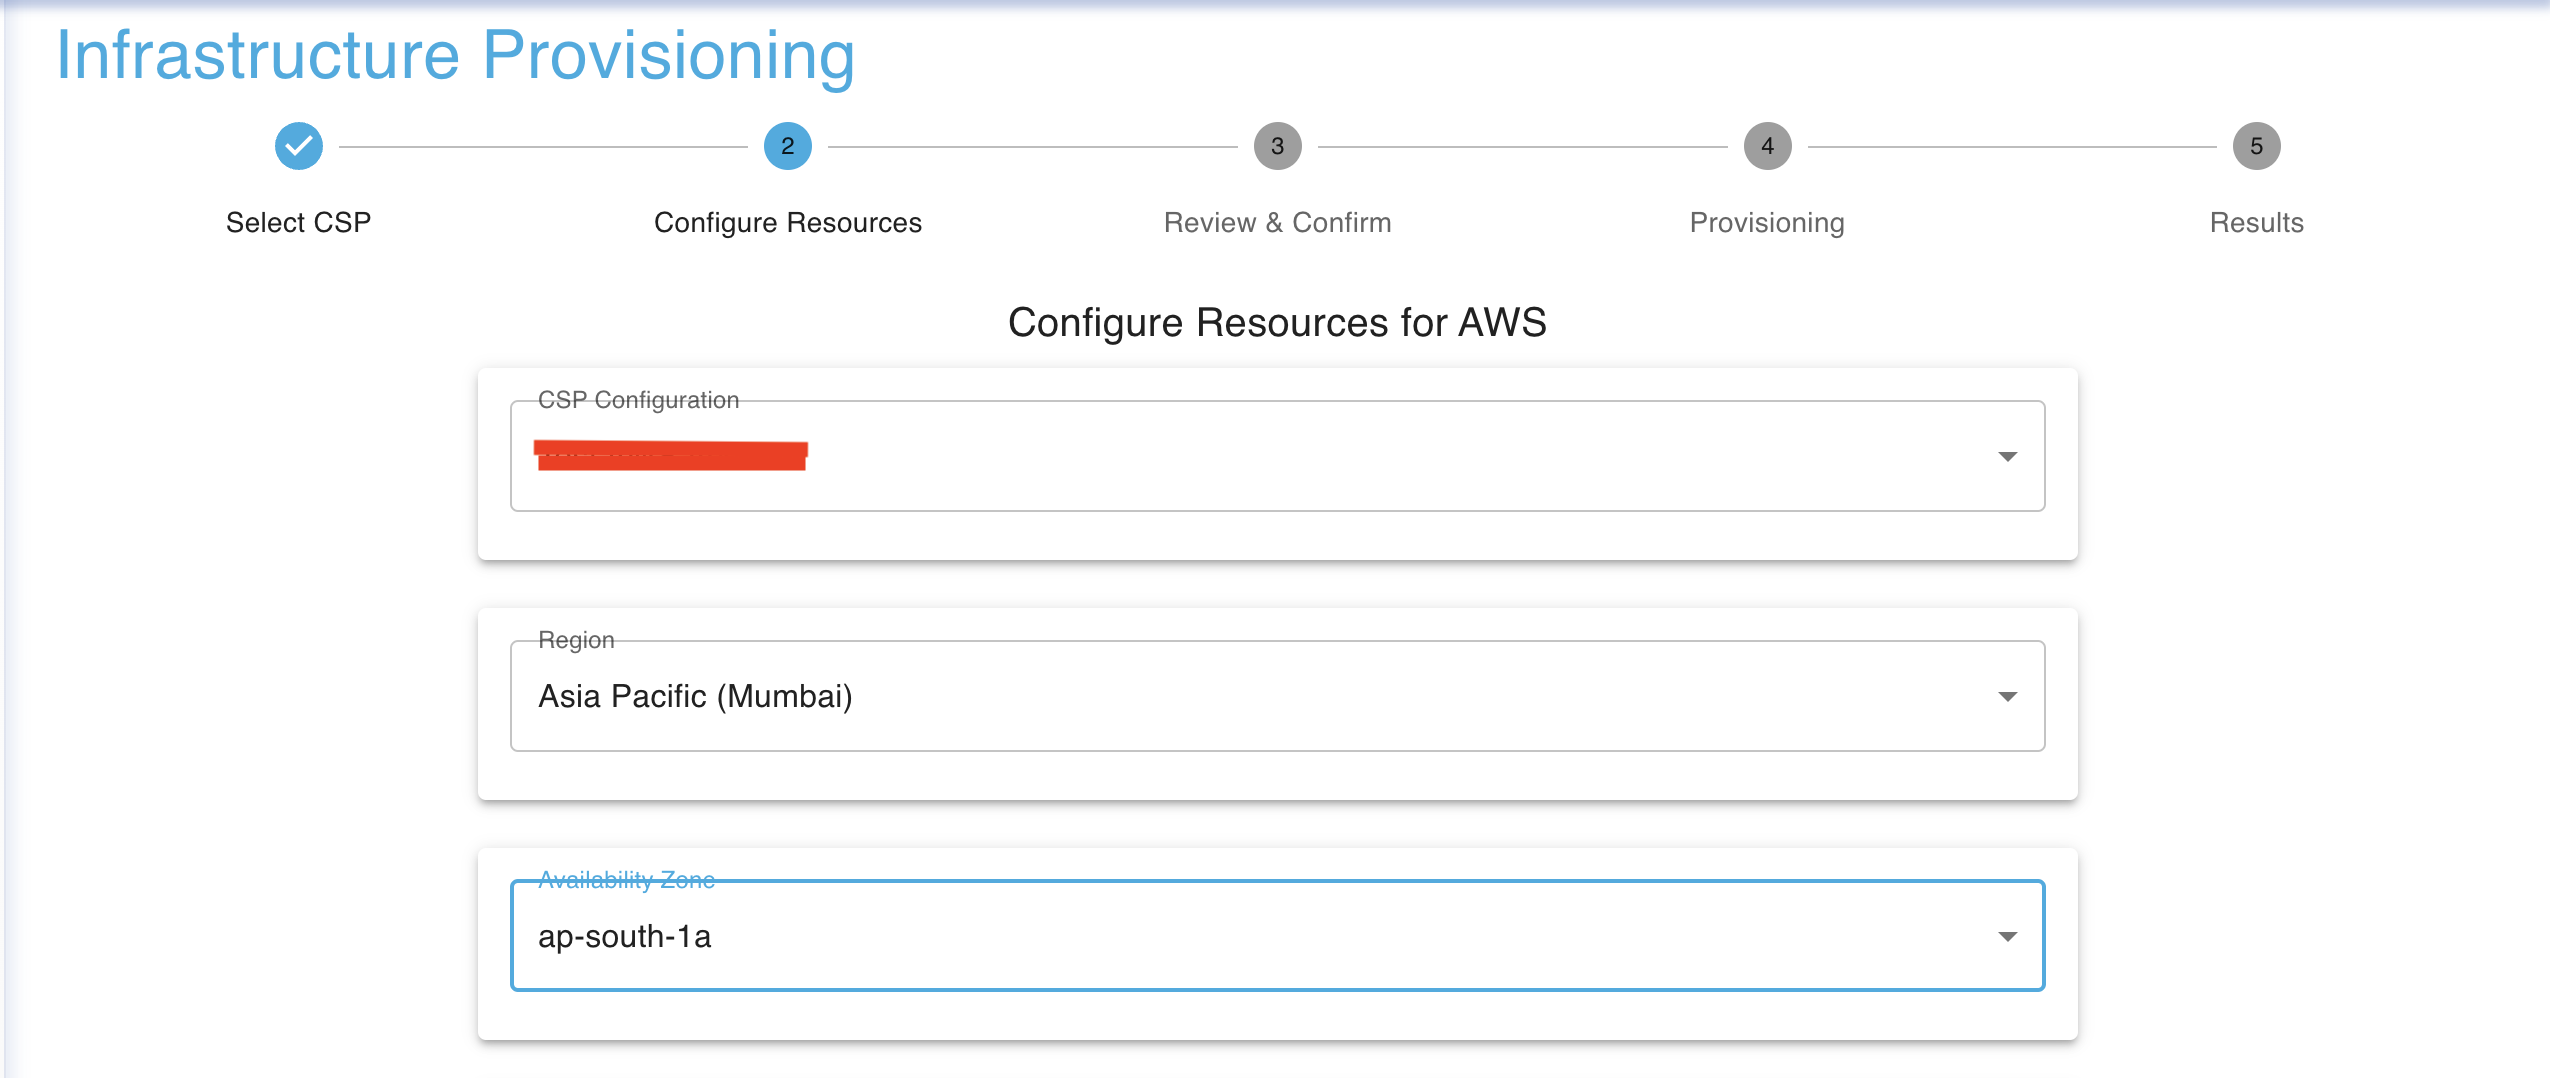
Before you start with the configuration of the resources itself, you will have to follow the following steps
-
Enter the CSP configuration in which you would like to add your resources to.
-
The Region in which you would like to create your resources.
-
The Availability Zone in which you would like to create your resources.
The image below represents what your page would look like upon filling in these pre-requisite steps.
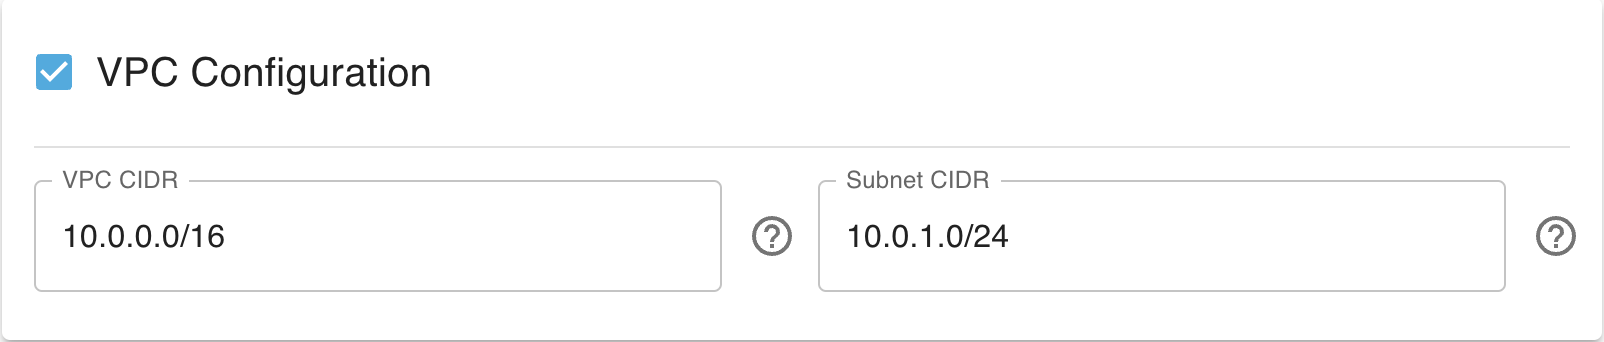
VPC Configuration
You may configure VPCs with just two simple steps
-
Enter the required VPC CIDR.
-
Enter the required Subnet CIDR.
The image below will provide you with an example of what it would look like
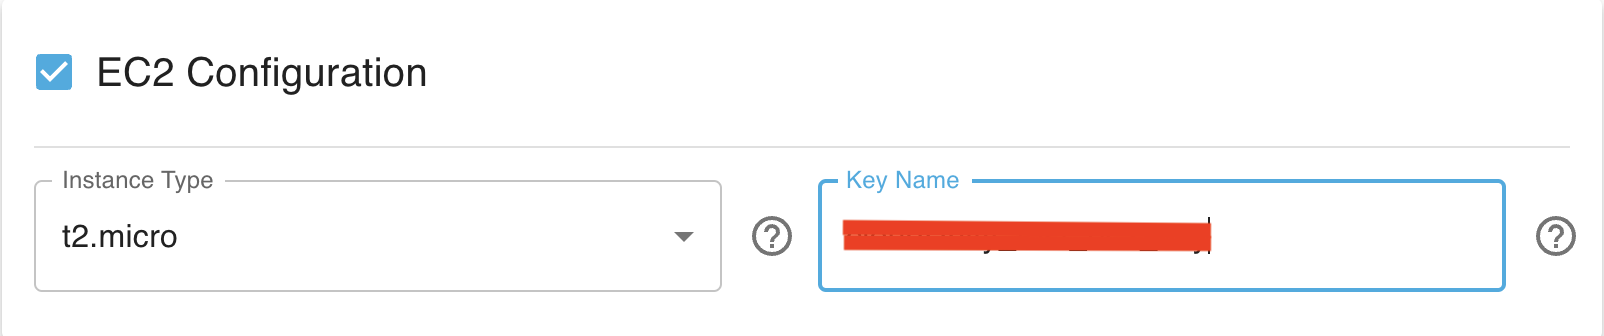
EC2 Configuration
You may Configure EC2 Instances with two simple steps
-
Select the desired instance type using the dropdown.
-
Enter the desired key name.
The image below will provide you with an example of what it would look like
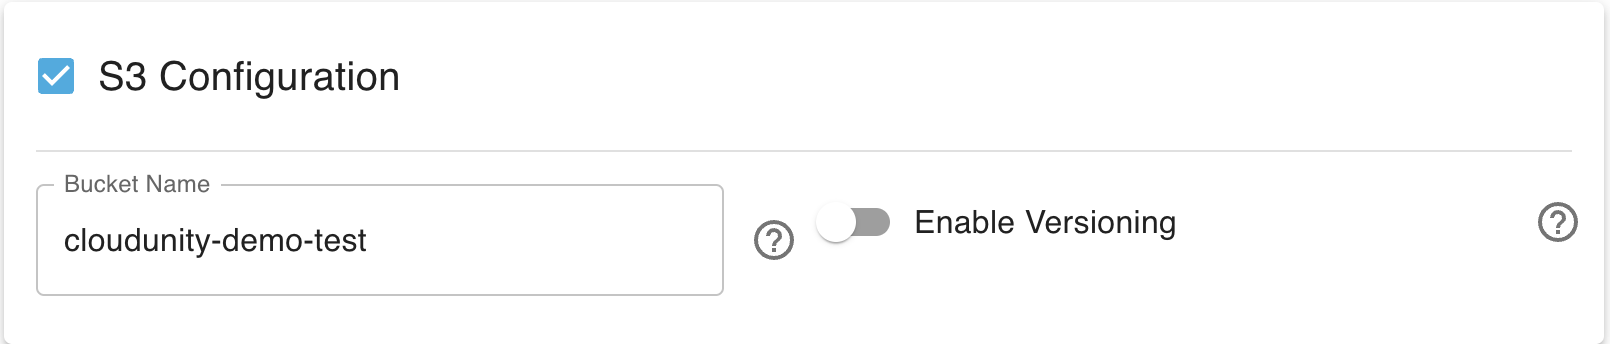
S3 Configuration
You may Configure S3 Buckets with two simple steps
-
Enter the name you would like to assign to your S3 Bucket.
-
You may enable or leave bucket versioning turned off.
The image below will provide you with an example of what it would look like
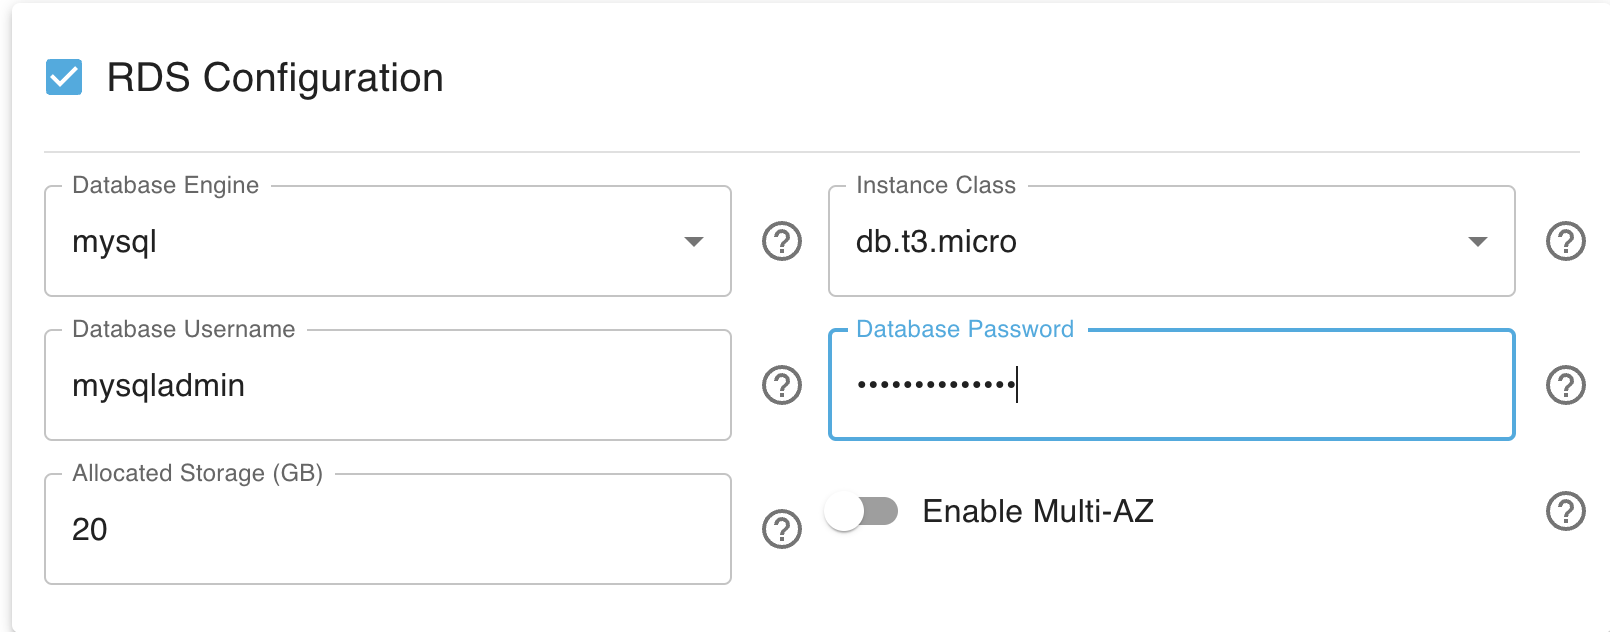
RDS Configuration
You may Configure RDS Databases with six simple steps
-
Choose your desired database engine using the dropdown.
-
Choose your desired instance class using the dropdown.
-
Enter your desired database username.
-
Enter your desired database password.
-
Enter the allocated storage in GB.
-
You may turn on Multi-AZ for higher availablity and easier disaster recovery processes.
The image below will provide you with an example of what it would look like
Enabling/Disabling Resources to be added
Often times the infrastructure requires you to add only a compute, database, network or storage or maybe even a combination of any of these resources. In order achieve that we enable a single click procedure that allows you choose the resources required to be added.
You can achieve this by clicking on the blue check boxes which will disable the resource and clicking on an empty check box allows you to enable the resource for infrastructure provisioning.
By default, all the resources are enabled. You may disable them as you wish. The image below depicts a disabled VPC configuration.

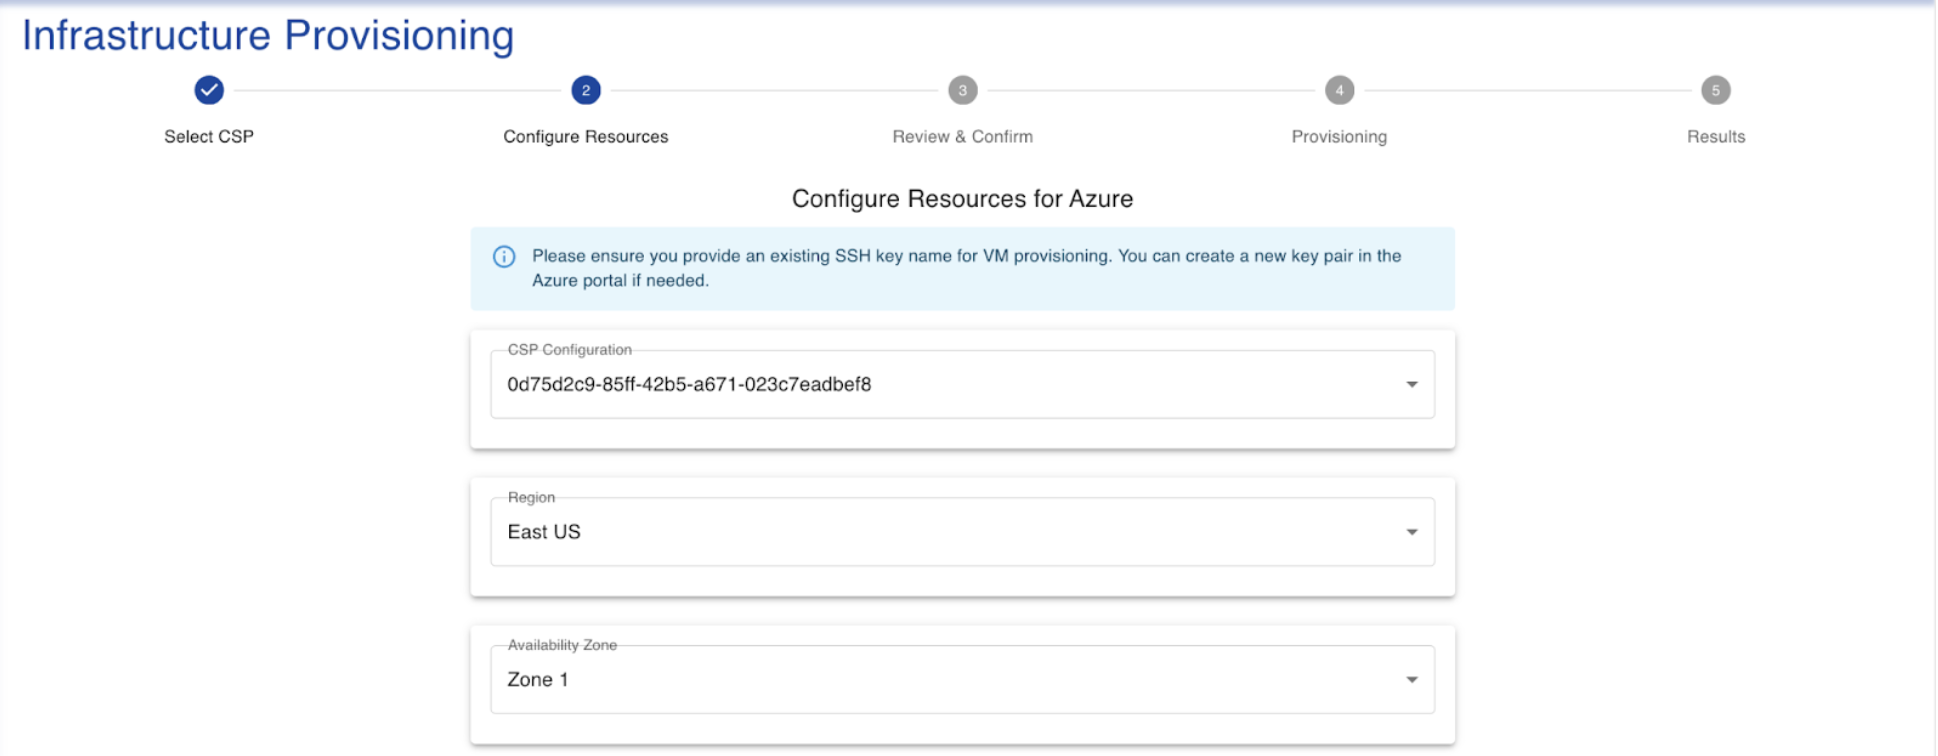
Configure Resources with Azure
If you have chosen Azure you will be allowed to configure the following resources
-
VNet Configuration
-
VM Configuration
-
Storage Configuration
-
Database Configuration
Before you start with the configuration of the resources itself, you will have to follow the following steps
-
Enter the CSP configuration in which you would like to add your resources to.
-
The Region in which you would like to create your resources.
-
The Availability Zone in which you would like to create your resources.
The image below represents what your page would look like upon filling in these pre-requisite steps.
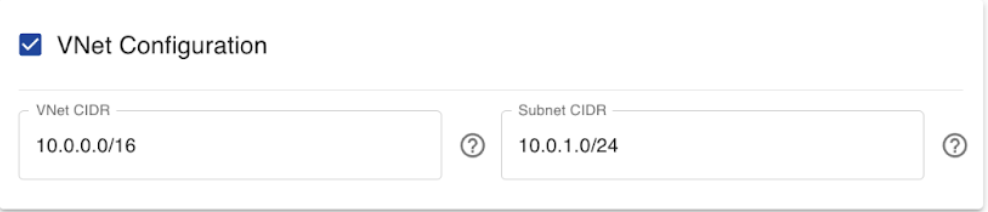
VNet Configuration
You may configure VNets with just two simple steps
-
Enter the required VNet CIDR.
-
Enter the required Subnet CIDR.
The image below will provide you with an example of what it would look like
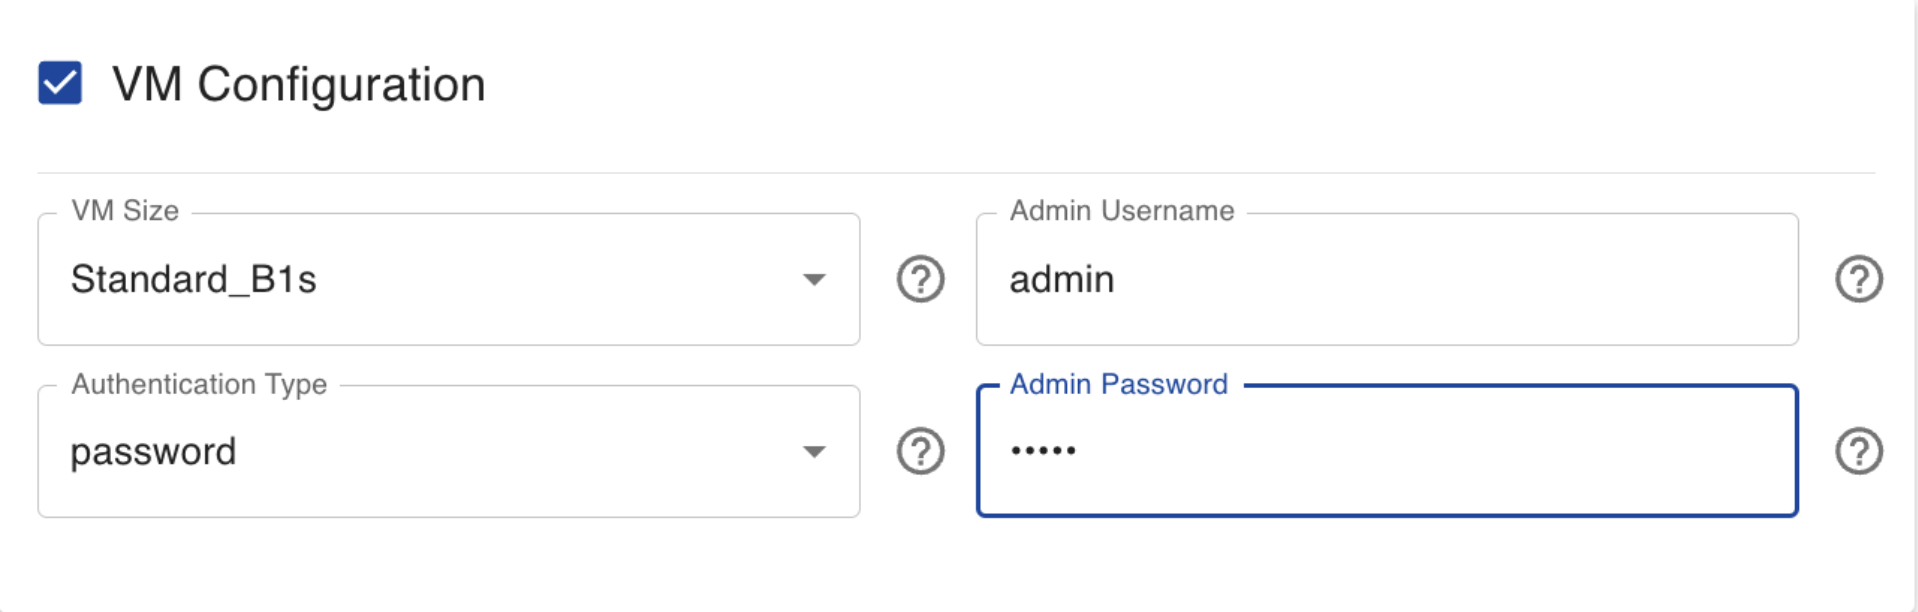
VM Configuration
You may Configure VMs with 4 simple steps
-
Select the desired VM size using the dropdown.
-
Enter the desired Admin Username.
-
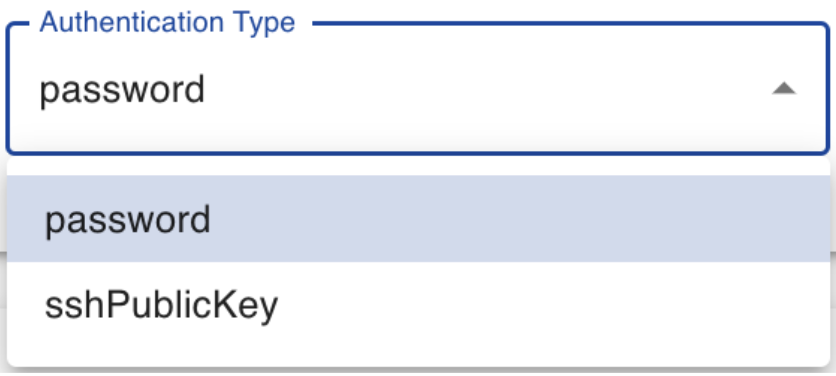
Select the desired Authentication Type using the dropdown.The two allowed Authentication Types are
i. Password
ii. sshPublicKey
NOTE: In order to use the sshPublicKey, you must already have a sshPublicKey.
Here is the image of the available options for Authentication Types
- Enter your Admin password or sshPublicKey.
The image below will provide you with an example of what it would look like
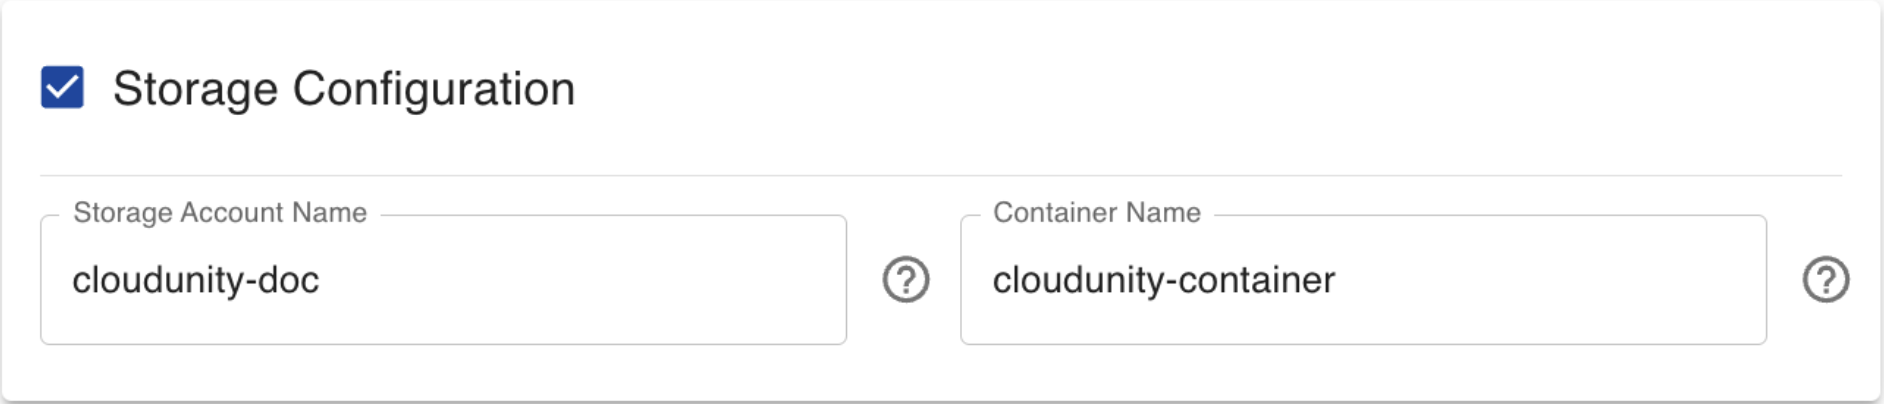
Storage Configuration
You may Configure Storage with two simple steps
-
Enter the Storage account name.
-
Enter the contianer name.
The image below will provide you with an example of what it would look like
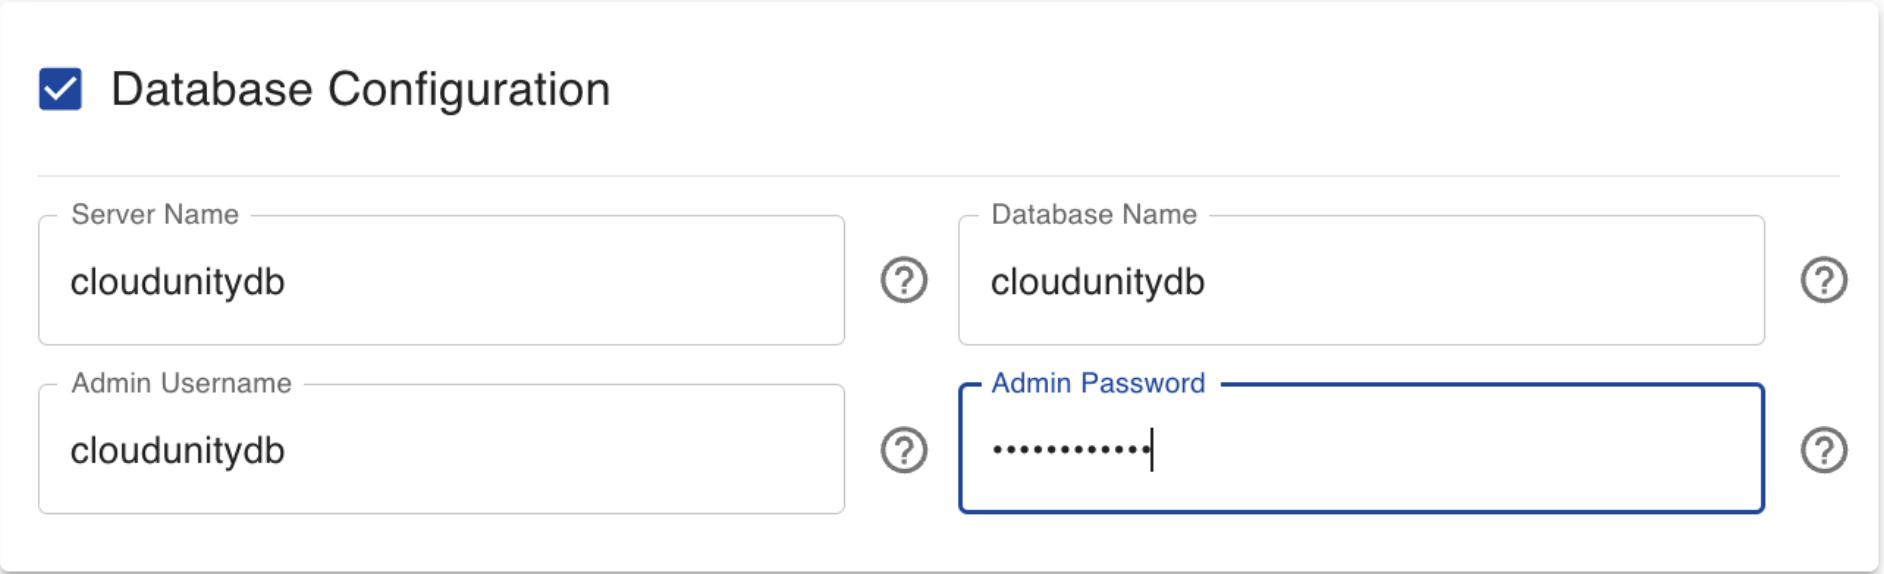
Dataabase Configuration
You may Configure RDS Databases with four simple steps
-
Enter your desired server name.
-
Enter your desired database name.
-
Enter your desired Admin username.
-
Enter your desired Admin password.
The image below will provide you with an example of what it would look like
Enabling/Disabling Resources to be added
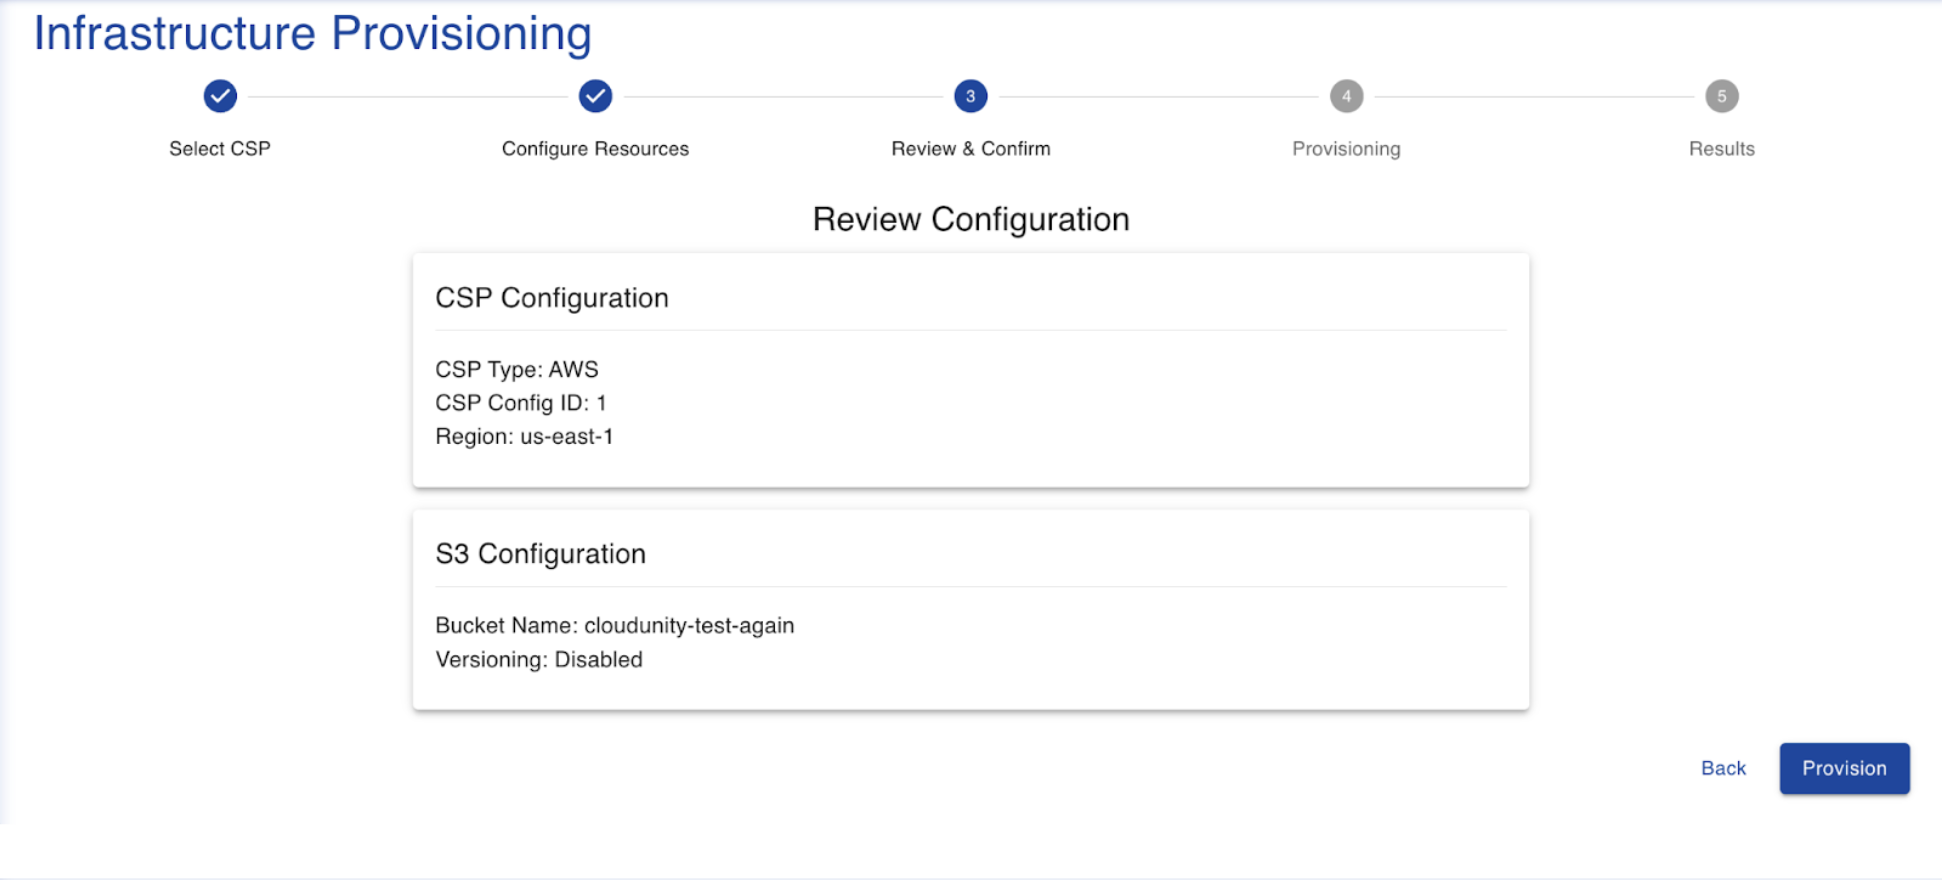
Review and Confirm
Upon the configuration of resources for your infrastructure you would be prompted with a screen which summarises your inteded changes to be procceded with. Please verify if the review page aligns with your requirements, if not please click on "Back" and proceed with the required changes to be made. If found the review aligns with your interests go ahead and click on "Provision". The image below represents the Review and Confirm page.
Provisioning
Upon clicking on "Provision" in the Review and Confirm section, you will automatically be led to this screen and you will have to wait until your resources are provisioned and taken to the next page which is Results. The image below depicts an accurate picture of the Provisioning page.

Results
Upon the provisoning of your resources, you are automatically redirected to the Results page. The Results page displays that your provisioning was successful and provides a link to the Resource Management to show you that the provisioned resources have been added.